TENS Unit Placement Guide: Where to Put the Pads for Every Pain Area
Dr. David Taylor, MD shows exactly where to place TENS pads for back, neck, sciatica, knee, and foot pain — plus the spacing, settings, and no-go zones that make it work safely.
Updated
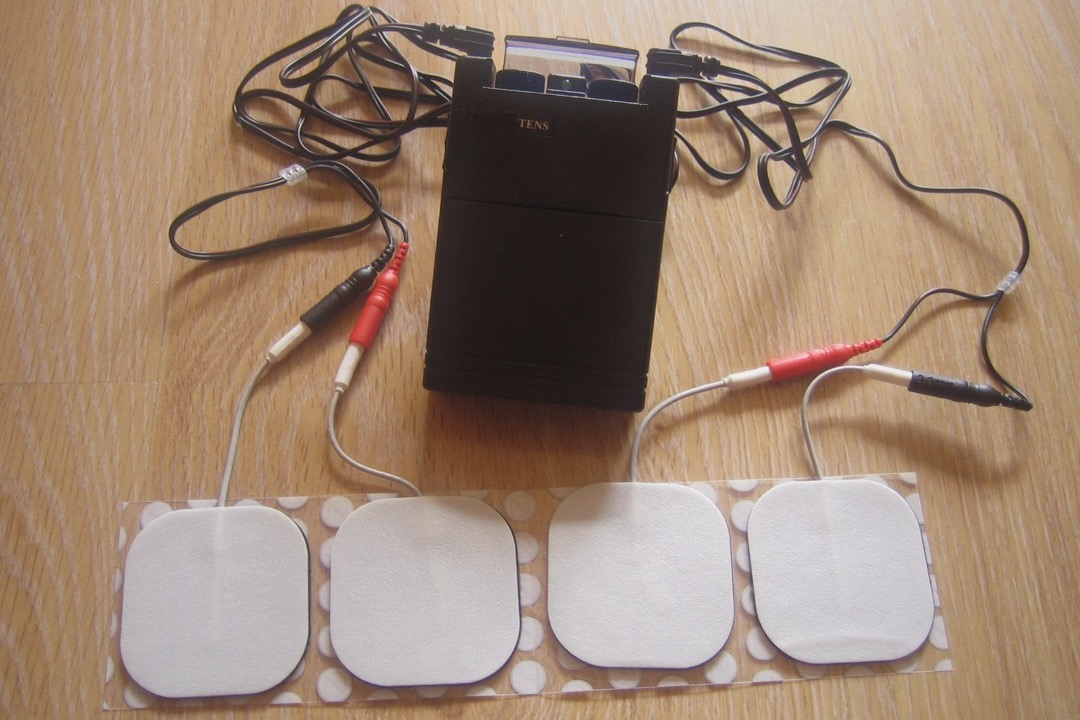
If you have ever opened a brand-new TENS unit, peeled the pads off the plastic, and then stood there with no idea where they actually go, you are in good company. The device is only as good as where you stick the electrodes — placement determines whether you get real relief or just a faint tingle in the wrong spot. This guide is the placement reference I wish every patient had before their first session: exactly where the pads go for the lower back, neck, sciatica, shoulder, elbow, wrist, hip, knee, calf, and foot, with both two-pad and four-pad setups, plus the spacing, settings, and the danger zones you must avoid.
I am Dr. David Taylor. I have spent years helping patients manage musculoskeletal and nerve-related pain, and a TENS unit is one of the few drug-free tools I recommend often, because when it is placed correctly it genuinely helps, it is inexpensive, and it has a clean safety profile in the right patient. The catch is that “placed correctly” does a lot of work in that sentence. Manufacturer diagrams are generic, and the difference between a pad an inch too high and a pad an inch too low can be the difference between relief and frustration. If you are still shopping, my roundup of the best TENS units walks through what features actually matter; if you already own one, read on. Everything here is grounded in how these devices actually work, and where the evidence supports them.
How TENS Therapy Works (Brief Overview)
You came here for placement, not a physiology lecture, so I will keep this short — but a couple of sentences of mechanism make every placement decision below make sense.
TENS relieves pain through two well-described pathways. The first is gate control theory, described by Melzack and Wall in 1965: stimulating the large, fast sensory nerves in your skin and muscle floods the spinal cord with non-painful signals that effectively “close the gate” on the slower pain signals trying to reach your brain. This is why conventional high-frequency TENS produces fast relief that fades soon after you turn it off — you are competing with the pain signal in real time. The second pathway is endorphin release: low-frequency, twitch-producing stimulation prompts your nervous system to release its own opioid-like chemicals, which build more slowly but can outlast the session.
That is the whole secret to placement. Because the goal is to get current flowing through the painful tissue and across the sensory nerves serving it, you place pads so the pain sits between them or along the nerve’s path — and you keep them off bone, off vulnerable structures, and on healthy, sensate skin. The clinical evidence, summarized in sources like StatPearls, is strongest for postoperative pain, chronic low back pain, knee osteoarthritis, and fibromyalgia; it is a symptom-management tool, not a cure.
General Rules for TENS Pad Placement
Before we go area by area, internalize these universal rules. They apply everywhere on the body and they fix the majority of “it’s not working” complaints I hear.
How Far Apart Should TENS Pads Be?
The single most common mistake is placing pads too close together. The minimum gap is one inch (about 2.5 cm) between pad edges on the same channel. When pads touch or nearly touch, the current takes the easy route straight across the skin surface from one pad to the other and barely penetrates the tissue underneath — you feel a surface tingle and get almost no therapeutic effect. The pads need a gap so the current is forced to travel down through the muscle, the fascia, and the sensory nerves where your pain actually lives.
The logic is simple: position the two pads so the painful spot sits in the path of the current between them. For small joints like the wrist or elbow, two inches of separation is plenty. For broad areas like the low back or thigh, three to six inches works well. Past about eight inches the current spreads thin and the sensation weakens, so wider is not better. The everyday sweet spot for most areas is two to four inches, painful spot squarely in the middle.
Parallel Bracketing vs. X-Pattern vs. Nerve Pathway — Which to Use When
There are three placement geometries, and choosing the right one is most of the skill.
Parallel bracketing is the default. You place two pads on either side of the painful area, in line with the muscle fibers, so the current runs straight through the sore zone. Use this for localized muscle pain — a low back spasm, a tight trapezius, a sore quadriceps.
The X-pattern (crossing) uses four pads on two channels arranged so the currents cross over a central painful point, concentrating stimulation at the intersection. Use this for a deep, focal pain such as a stubborn knot in the mid-back or a deep joint, where you want the current to converge on one spot from multiple directions.
Nerve-pathway placement follows the route of a nerve rather than surrounding a muscle. You place one pad near the origin of the pain and another further along the path the pain travels. Use this for radiating pain — sciatica running down the leg, or pain shooting from the neck into the shoulder. Here you are chasing the nerve, not bracketing a muscle.
How to Prepare Your Skin
Good contact is non-negotiable, and poor contact is the most common cause of weak stimulation, a stinging “hot spot,” or pads that will not stay on. Before placing pads: wash the area with soap and water to remove oils, lotion, and sweat, then dry it completely. Avoid applying moisturizer or oil before a session. If the area is very hairy, trim — do not shave immediately before, since freshly shaved skin is more easily irritated by the current. Press each pad down firmly across its whole surface so there are no lifted edges, because a lifted edge concentrates current and stings. After the session, store the pads on their plastic liner and replace them once they stop sticking reliably; worn pads give patchy contact and irritate the skin.
Choosing the Right Pad Size for Each Body Area
Pad size is an underused lever. Larger pads spread current over more tissue for a gentler, broader sensation; smaller pads concentrate it for targeted, intense stimulation. As a practical guide:
- Large pads (around 3” x 5” or 2” x 4”): the lower back, the upper back, the large muscles of the thigh and hamstring, and the buttock. These areas have a lot of muscle, and big pads cover it comfortably.
- Medium pads (around 2” x 2” squares): the shoulders, the mid-back, the calves, and the front of the thigh. A versatile everyday size.
- Small pads (around 1.5” x 1.5” or 1” x 1”): the wrist, the elbow, the ankle, the top and bottom of the foot, and the hand. Small joints need concentrated current in a compact area, and large pads simply will not sit flat there.
If your unit came with only one pad size, that is fine to start — but if you treat both a large area like the back and a small joint like the wrist, buying a second pad size makes both placements work far better.
TENS Pad Placement by Body Area
This is the core of the guide. For each region I give a default two-pad setup, a four-pad option when it helps, and any variant for radiating versus local pain. Throughout, the same rules apply: straddle the spine, keep pads off bone and off the front of the neck and chest, and aim for a strong, comfortable tingle — never a painful jolt.
Lower Back Pain
For pain on one side of the low back, use parallel bracketing on the affected paraspinal muscle: place one pad about an inch above the most painful point and the second about an inch below it, both an inch or more to the side of the spine, so the current runs vertically through the sore band. Never put a pad on the midline of the spine itself.
For pain across both sides, go to a four-pad setup: two pads bracketing the left paraspinals and two bracketing the right, forming a rectangle around the whole painful zone. This is the everyday workhorse placement for non-specific low back pain, which is one of the better-supported uses of TENS in the literature.
If the pain radiates into the buttock, switch one channel to nerve-pathway placement: keep one pad on the lower back and move its partner down over the buttock, following the line of the discomfort. A TENS unit pairs well with mechanical support during a flare — many of my patients combine it with one of the best back braces for activity, and alternate it with heating pads between sessions for muscle relaxation.
Sciatica and Radiating Leg Pain
Sciatica deserves its own approach because the placement depends on the cause, and getting this distinction right is what separates relief from frustration.
If the pain originates from a pinched nerve root in the spine (true sciatic radiculopathy), use a two-zone approach: one channel on the lower back paraspinals on the affected side to address the source, and a second channel following the pain down the back of the buttock and thigh — placing pads along the route the pain travels. Stop short of the area directly behind the knee, where major nerves and vessels run close to the surface.
If the pain comes from the piriformis muscle in the deep buttock squeezing the nerve (piriformis syndrome), the target is different: concentrate the pads on the buttock muscle itself, one over the tender point and one a few inches away on the same muscle, bracketing the knot. Because sciatic pain migrates day to day, place pads where the pain is most intense that session rather than rigidly following any single diagram, and stop immediately if stimulation makes the leg symptoms worse rather than better.
Upper and Mid Back Pain
For the upper and mid back, straddle the spine exactly as you do lower down: place pads on the muscle columns on either side, never on the vertebrae. For a localized knot — the kind that sits between the shoulder blade and the spine — the X-pattern shines: four pads arranged so two channels cross directly over the knot, converging current on that focal point. For a broader band of tension across the mid-back, parallel bracketing with the pads above and below the sore zone works well. Keep pads off the bony shoulder blade itself and on the surrounding muscle.
Neck Pain
Neck placement comes with a hard safety rule: only the back of the neck (the posterior region) is fair game — never the front or sides. Place pads on the muscles either side of the spine at the base of the neck and across the top of the shoulders, bracketing the painful, tight muscle. For tension that wraps from the neck into the upper trapezius, run one channel down each side from the base of the skull toward the shoulder, staying on muscle.
Why is the front of the neck off-limits? The carotid sinus sits on the front and sides of the neck and helps regulate your blood pressure and heart rate. Stimulating it can trigger a sudden drop in blood pressure, dizziness, or fainting, and the area is also close to the muscles and nerves that control your airway and swallowing. There is no safe reason to place a pad on the throat or front of the neck — keep stimulation strictly to the back.
Shoulder Pain
For general shoulder and rotator-cuff pain, bracket the painful area: place one pad on the front of the shoulder and one on the back, or one above and one below the sore region, so the current crosses the joint. For frozen shoulder and deeper capsular pain, a four-pad setup surrounding the joint from front, back, top, and side gives broader coverage. For trapezius-driven pain that sits more on the top of the shoulder and into the neck, shift the pads onto the meaty trapezius muscle rather than the joint itself.
Shoulder pain often responds well to a combination approach. I frequently have patients use TENS for the pain and add percussive therapy to loosen the surrounding muscle — one of the best massage guns is a useful complement for the thick trapezius and the muscles around the shoulder blade, used between TENS sessions rather than at the same time.
Elbow Pain — Tennis Elbow and Golfer’s Elbow
Elbow tendon pain comes in two flavors, and they are on opposite sides of the joint. Tennis elbow (lateral epicondylitis) is pain on the outer elbow, where the wrist-extensor tendons attach. Place one small pad just above the tender bony bump on the outside of the elbow and one just below it on the forearm muscle, bracketing the sore tendon. Golfer’s elbow (medial epicondylitis) is the mirror image on the inner elbow; place the pads straddling the inner bony bump the same way. Use small pads here — the area is compact, and large pads will not sit flat across the joint. Keep the current to a comfortable tingle, since the skin over the elbow is thin and sensitive.
Wrist Pain and Carpal Tunnel Syndrome
For general wrist pain, bracket the sore area with small pads above and below the wrist joint. For carpal tunnel syndrome, where the median nerve is compressed at the wrist, place one pad on the palm side of the forearm just above the wrist crease and one a couple of inches up the forearm, so the current runs along the path of the median nerve — a nerve-pathway placement rather than a joint bracket. Keep intensity modest; the wrist is sensitive and the goal is a gentle tingle, not a strong contraction.
TENS treats the pain of carpal tunnel but not the mechanical compression, so it works best alongside the things that actually offload the nerve. I almost always pair it with one of the best carpal tunnel wrist splints for nighttime use, since keeping the wrist in a neutral position overnight does more to settle median-nerve irritation than any single TENS session.
Hip Pain
The hip has several distinct pain patterns, so identify which one you have. For lateral hip pain over the bony point on the outside of the hip (greater trochanteric pain), bracket that tender prominence with one pad above and one below, on the surrounding muscle rather than directly on the bone. For deep gluteal pain, place pads on the buttock muscle straddling the sore area. For hip-flexor pain at the front of the hip and groin, place pads on the muscle at the front of the hip, keeping well clear of the groin’s major vessels and the genitals. The hip’s depth means a wider pulse width helps the current reach the deeper tissue.
Knee Pain
The knee is a TENS-friendly joint, and osteoarthritis of the knee is one of the better-supported indications. For general knee pain, use a two-pad setup with one pad on the inner side of the knee and one on the outer side, just above or surrounding the kneecap — so the current crosses the joint horizontally. Do not place a pad directly on the kneecap. For more complete coverage, a four-pad square pattern surrounds the joint: pads at the inner, outer, upper, and lower aspects, so the current crosses the joint from multiple directions. For patellar tendon pain (jumper’s knee) below the kneecap, bracket the tendon with one pad just above and one just below it.
A brace and TENS work together nicely for knee osteoarthritis and ligament strains — the best knee braces provide stability during activity while TENS handles pain at rest, and the two do not interfere with each other.
Calf Cramps and Achilles Tendon Pain
For calf pain or cramping, place pads on the belly of the calf muscle, one toward the inner side and one toward the outer side, or one higher and one lower on the muscle, bracketing the cramping or sore area. For Achilles tendon pain, the tendon itself is thin and close to the skin, so straddle it rather than placing a pad directly on it: one pad on the lower calf above the tendon and one on the heel or just to the side of the tendon. Use small or medium pads, and keep intensity comfortable — the back of the lower leg is sensitive.
Foot Pain and Plantar Fasciitis
Foot placement requires small pads, because the foot is bony and contoured and large pads will not lie flat. For general foot pain, bracket the painful region with two small pads. For plantar fasciitis, where the pain centers on the heel and arch on the sole, place one pad on the heel and one toward the arch along the sole, following the line of the plantar fascia — or place pads on the inner and outer aspects of the heel to bracket it. Keep intensity gentle on the sole, which is thick-skinned in some spots and very sensitive in others.
TENS eases plantar fasciitis pain but does not address the mechanical strain on the fascia, so it works best combined with the supports that actually offload the arch. I routinely pair it with one of the best plantar fasciitis insoles for daytime support and a foot massager for circulation and tissue relaxation in the evening.
Shin Splints
Shin splints (medial tibial stress syndrome) are common in runners and anyone who has ramped up activity too fast. The pain runs along the inner edge of the shinbone. Place pads on the muscle just to the side of the tender bony edge — never directly on the shinbone itself, which is right under the skin and a poor target. Bracket the most painful stretch of the shin with one pad toward the top and one toward the bottom of the sore zone, on the muscle. TENS manages the pain, but the real fix for shin splints is load management, footwear, and rest — treat the stimulation as symptom relief while you address the training error that caused it.
TENS Settings Guide by Pain Type and Body Area
Placement gets the current to the right place; settings determine what the current does once it gets there. Use this as a starting reference, then adjust to comfort — the right intensity is always “strong but comfortable,” never painful.
| Body Area / Pain Type | Frequency (Hz) | Pulse Width (µs) | Acute vs. Chronic Note |
|---|---|---|---|
| Lower / upper back (acute spasm) | 80–120 (conventional) | 150–200 | Fast relief; default for new flares |
| Lower back (chronic, deep ache) | 2–10 (acupuncture-like) | 200–300 | Slower, longer-lasting; endorphin-driven |
| Neck / trapezius | 80–120 | 150–200 | Keep to posterior neck only; modest intensity |
| Shoulder (deep / frozen) | 2–10 | 200–300 | Wider pulse penetrates the joint capsule |
| Elbow / wrist (superficial tendon) | 80–120 | 150–200 | Small pads, gentle intensity |
| Hip (deep) | 2–10 | 200–300 | Wider pulse for depth |
| Knee (osteoarthritis) | 80–120 | 150–200 | Well-supported indication |
| Calf / foot | 80–120 | 150–200 | Sensitive areas; ease intensity up slowly |
| Chronic widespread pain | 2–10 | 200–300 | Twitch-producing; endorphin release |
The pattern to remember: conventional high-frequency (80–120 Hz, shorter pulse) for acute, sharp, or superficial pain — it works fast through gate control. Acupuncture-like low-frequency (2–10 Hz, wider pulse) for deep, chronic, aching pain — it works slower but lasts longer through endorphin release. A wider pulse width also reaches deeper tissue, which is why deep joints like the hip and shoulder benefit from the higher end. If your unit has named presets, the “acute” and “chronic” programs are built around these exact ranges.
One important clarification: these settings are for pain relief, which is what TENS does. If your device also has a muscle-strengthening mode, that is EMS, and it uses entirely different settings and placement — pads go on the muscle belly to produce a contraction, not around the pain. I cover that distinction in detail in TENS vs EMS.
Where You Should Never Place TENS Pads
Some placements are not a matter of effectiveness — they are a matter of safety. Memorize these.
Absolute No-Zones
- The front and sides of the neck and throat. The carotid sinus there regulates blood pressure and heart rate; stimulating it can cause fainting or a dangerous blood-pressure drop, and the area sits near your airway. Only the back of the neck is acceptable.
- Over the eyes or on the temples and head. Sensitive structures, no benefit, real risk.
- On the mouth or inside the mouth.
- Across the chest in a way that routes current through the heart — for example, one pad on the left chest and one on the right back. Never let current cross the heart.
- Directly on the bony spine. Always straddle it with pads on the paraspinal muscles.
- The front of the neck and the carotid area, restated because it is the most dangerous error people make.
Skin Conditions and Tissue to Avoid
- Broken, irritated, infected, or recently scarred skin, and skin that has been radiated.
- Numb areas where you cannot feel the stimulus — without normal sensation you cannot judge intensity and can burn the skin.
- Over implanted hardware — pacemakers, defibrillators, insulin pumps, surgical metal, or pumps.
- Over a known blood clot, varicose veins, or thrombophlebitis — stimulation over a clot is dangerous.
- Over active cancer or tumors, unless a physician specifically directs palliative use.
TENS Unit Contraindications — Who Should Not Use TENS
Beyond where the pads go, some people should not use TENS at all without medical direction.
Absolute Contraindications
- Pacemakers, implantable cardioverter-defibrillators (ICDs), and other active implanted electronic devices. TENS current can interfere with the device’s sensing. This is a do-not-use-on-your-own situation; only a cardiologist can judge whether any supervised use is appropriate.
- Undiagnosed pain. If you do not know what is causing the pain, masking it with TENS can delay diagnosis of something that needs treatment. Get the cause identified first.
Relative Contraindications (Use Only With Medical Guidance)
- Pregnancy — avoid the abdomen, low back, and pelvis entirely; use elsewhere only with your obstetric provider’s guidance. (Labor TENS on the back, under maternity-unit protocol, is a recognized exception.)
- Epilepsy or a seizure disorder — particularly avoid stimulation near the head and neck.
- Impaired sensation — diabetic neuropathy or any condition that blunts skin sensation makes it hard to judge intensity safely.
- Deep vein thrombosis or thrombophlebitis — never stimulate over a clot.
- Cognitive impairment in someone who cannot reliably report discomfort.
When you are unsure whether you fall into one of these categories, the safe move is a quick conversation with your physician before your first session. TENS is low-risk in the right person, but “the right person” is the whole point of this list.
When TENS Is Not Enough: See a Doctor If…
TENS is a symptom tool. It quiets pain; it does not treat the disease, the disc, the tumor, or the infection underneath. Most of the time that is perfectly fine — pain itself is the problem you are trying to solve. But there are signals that mean the pain is a messenger you must not silence with a TENS unit. Seek prompt medical care if you have any of the following:
- New weakness in an arm or leg, especially if it is progressing.
- Numbness in the groin or inner thighs (saddle anesthesia), or new loss of bladder or bowel control. Combined with back pain, this can signal cauda equina syndrome — a surgical emergency. Do not wait; go to the emergency room.
- Pain after significant trauma — a fall, a crash, a serious injury.
- Pain accompanied by fever, unexplained weight loss, or night sweats, which can point to infection or malignancy.
- Severe pain that keeps escalating despite reasonable treatment, or pain that wakes you from sleep every night.
- Chest pain, shortness of breath, or pain radiating into the jaw or left arm — never attribute these to muscle pain and reach for a TENS unit; they can be cardiac.
For ordinary musculoskeletal pain that is not waving any of these flags, it is reasonable to manage it with a layered approach: TENS for nerve-level relief, heat or cold for the muscle, and where appropriate, oral medication. I help patients weigh the trade-offs of the latter in my guide to OTC pain relievers compared, and many find that alternating TENS with heating pads between sessions gives better relief than either alone. The point is to use TENS as one well-placed tool, not as a reason to ignore a problem that deserves a diagnosis.
Common TENS Pad Placement Mistakes
After watching many patients learn this device, the same handful of errors come up again and again. Here is how to fix each one.
-
Placing the pads too close together. Current skips across the surface and you feel almost nothing useful. Fix: keep at least an inch — usually two to four — between pad edges, with the pain in between.
-
Putting a pad directly on the spine. It is uncomfortable and ineffective, and it targets the wrong tissue. Fix: straddle the spine, pads on the muscle columns to either side.
-
Treating the wrong spot. People place pads where they think the pain is rather than where it is most tender, especially with referred or radiating pain. Fix: press around the area first, find the most tender point, and bracket that.
-
Cranking the intensity to painful levels. More is not better; a painful jolt is counterproductive and can irritate the skin. Fix: turn it up only to a strong, comfortable tingle. If it stings, back off or check pad contact.
-
Using worn-out or poorly applied pads. Dried, peeling pads give patchy contact, weak stimulation, and hot spots. Fix: press pads down flat with no lifted edges, store them on their liner, and replace them once they stop sticking well.
-
Ignoring skin prep. Lotion, oil, and sweat block conduction. Fix: wash and fully dry the skin first, and skip the moisturizer beforehand.
-
Using the wrong pad size for the area. Big pads on a small joint will not sit flat; tiny pads on the broad back under-cover the muscle. Fix: large pads for the back and thighs, small pads for the wrist, elbow, ankle, and foot.
-
Leaving pads in one exact spot for hours or sleeping with the unit on. This irritates the skin and means you cannot monitor sensation. Fix: run sessions of 20 to 30 minutes, move the pads slightly between sessions, and never sleep with it running.
Get those eight right and you will be ahead of most first-time users. The device is genuinely useful when the pads are where they belong — and now you know exactly where that is. If you are still choosing a unit, or you need replacement pads and lead wires, my roundup of the best TENS units covers the channel counts, preset programs, and pad systems that make all of this easier to get right.
Frequently Asked Questions
Where do you place TENS pads for lower back pain?
Can you put TENS pads directly on your spine?
How far apart should TENS pads be placed?
Where should you never place TENS pads?
Can you use a TENS unit if you have a pacemaker?
How long should a TENS session last and how often can I use it?
Where do you place TENS pads for sciatica?
What frequency and pulse width setting should I use on a TENS unit?
Is it safe to use a TENS unit during pregnancy?
What is the difference between TENS and EMS pad placement?
Are TENS units FSA or HSA eligible?
Can a TENS unit make pain worse, and what does that mean?
Related Articles
About the Reviewer

Dr. David Taylor, MD, PhD
Drexel University College of Medicine (MD), Indiana University School of Medicine (PhD)
Dr. David Taylor is a licensed physician and medical researcher who founded BestRatedDocs in 2016. With an MD from Drexel University and a PhD from Indiana University School of Medicine, he combines clinical expertise with a passion for health technology to provide evidence-based product recommendations. Dr. Taylor specializes in health informatics and regularly evaluates medical devices, diagnostic equipment, and therapeutic products to help healthcare professionals and patients make informed decisions.